Copyright©2016 Carol Thelen
Tutorial by CI Carol Thelen
To find more tutorials like this and learn more about Carol, visit her website: QuiltNotes.com
When blocks such as the 8-point star and the kaleidoscope are sewn together, the center of the block is the intersection of eight pieces of fabric. All those seams coming together in one spot can create a large, thick lump. This lump is not pretty and can interfere with quilting designs because most needles cannot stitch into it.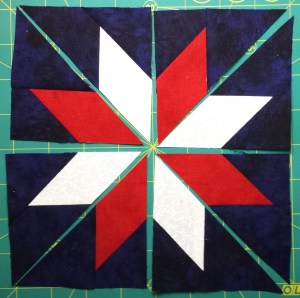 This tutorial shows how to achieve a flat center for an 8-pointed star block. When you finish the block using these steps you will have a tiny 8-pointed star in the center on the back of the block and the center will be as flat as the rest of the block.
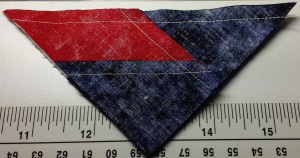
The 8 units in this block were paper pieced and the papers removed. This method works equally well with the kaleidoscope block which also has 8 units all meeting in the center.
Step One
In the first step you will stitch together adjacent pairs.
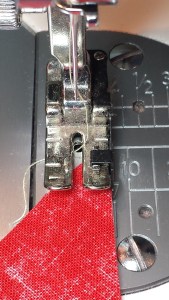
Use a 1/4″ seam allowance.
The horizontal seam line at the top is the seam that was just stitched.
To determine which way to press the seam look on the back side to see how the paper pieced seams were pressed.
Press in the same direction.
Now you have two pairs of quarter units with all seams pressed in the same direction. These seams go counter-clockwise.
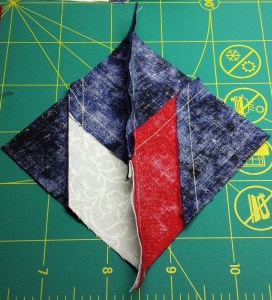
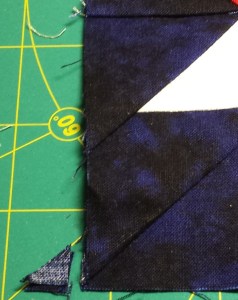
Step 2
Next you will sew pairs together.
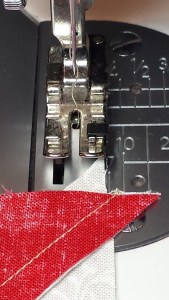
Use a 1/4″ seam allowance.
Notice the position of the vertical seam line that was just stitched. It does not start at the left-hand corner of the small white triangle. Instead it is 1/4″ from the right edge.
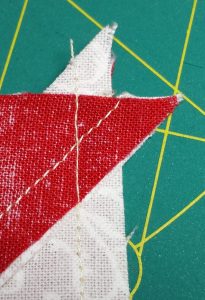
Turn the unit a quarter turn counter-clockwise so the seam just stitched is horizontal.
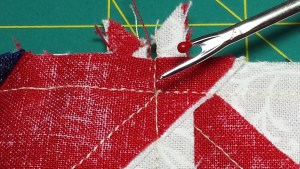
Locate the 4 to 6 diagonal stitches above the horizontal stitch line. In the picture above the seam ripper is pointing to these stitches.
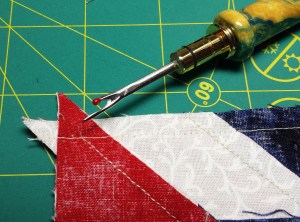
Remove those stitches on the first side and flip it over.
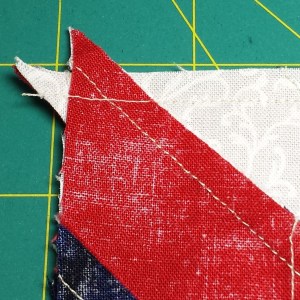
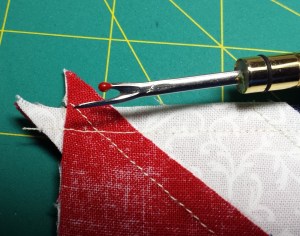
Locate the diagonal stitches on this side.

Remove the diagonal stitches. Repeat this step with the remaining pair of quarter units.
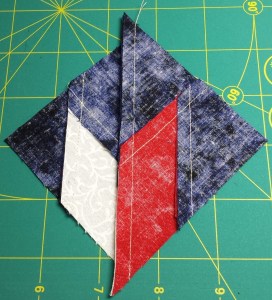
You now have a pair of half units. Press the seams in the same direction as the others.
Step Three
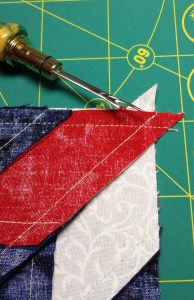
Sew the two half units together using a 1/4″ seam allowance.
At the center you will see 4 to 6 vertical stitches above the horizontal line of stitching.
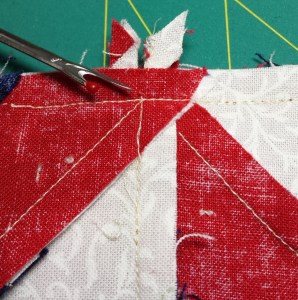
Remove those stitches. Flip the block over and do the same for the other side.
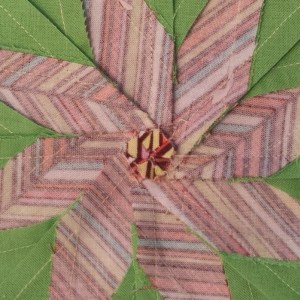
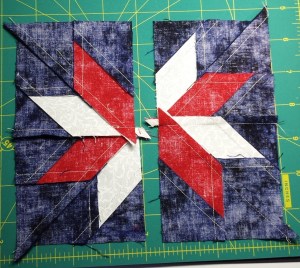
Open the block to view the back side. Open up the little star unit. Press the final two seams in the same counter-clockwise direction. You will see that every seam allowance is pressed in the same direction.
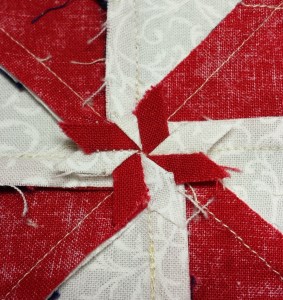
Close-up of the hidden star.

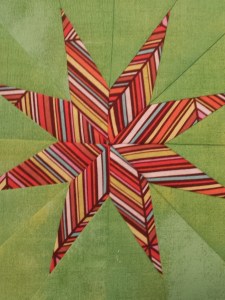
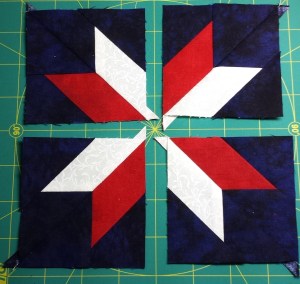
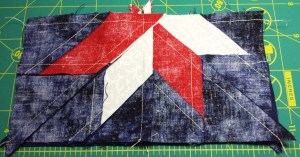
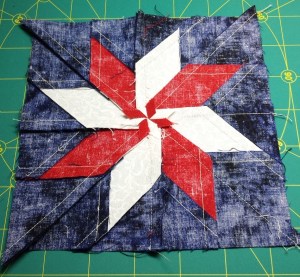
Finished block.
Finally, clip off the little nubs on each corner for easier piecing.
Smart Corners
Many quilters use templates to trim the points. One example is the Deluxe Corner Trimmer by Marti Michell.

Many of the recent foundation papers printed by Quiltworx.com include smart corners. If the template or foundation paper you used for your block had Smart Corners you can still use this method. Instead of ending up with a hidden star you will have a hidden disc like the one shown below.